


Knitting machine Hack - Ayab Tutorial
You can get overviews of different models of hacks in here
Ayab step by step tutorial
This tutorial is a complement to all the documentation and set up instructions you can find on
- Ayab’s website: http://ayab-knitting.com
-
To Order the AYAB shield https://www.etsy.com/search?q=hack%20ayab
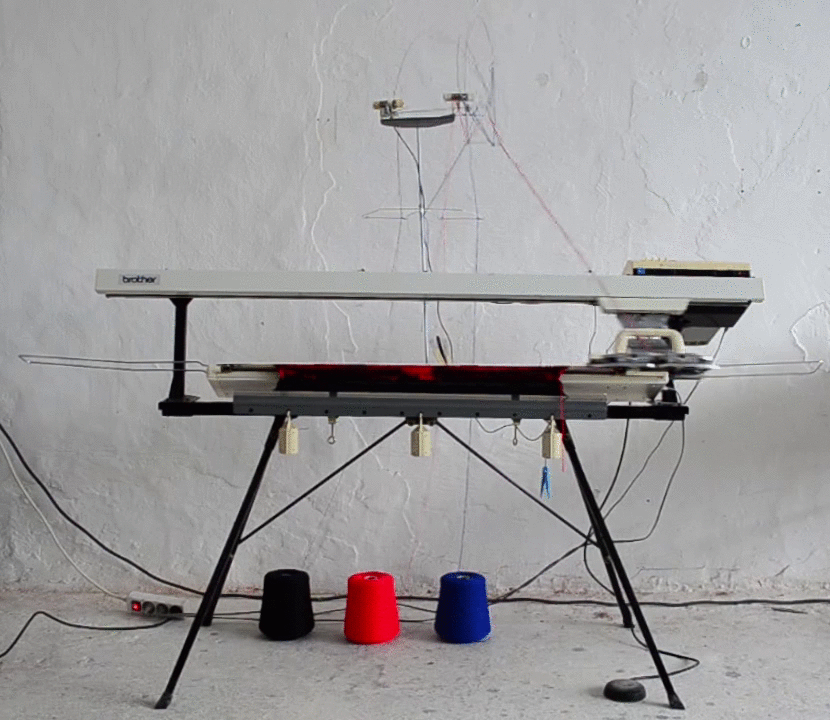
Ayab is a open source project from Andreas Müller and Christian Oberstiener. They based their hack on the idea that you replace the original electronic computer of your knitting machine with a custom made circuit and a Arduino micro controller. In this way you can connect your knitting machine to your computer and send black and white patterns or pictures row by row. The max width is 200 needles/ 200 pxl and the height is “infinite”.
KH 940/930/965 Brother Knitting Machine
(scroll down for the step by step tutorail for the kH 910 & KH 950 model)
Tested on Brother KH 940
Ubuntu 15.10 34bit
12/10/16
This tutorial is assuming you know how to knit with the knitting machine and that your knitting machine works. If you just got one and it doesn’t light up it can come from the capacitors that have blown up. Usually if the knitting machine hasn’t been turned on for a while it makes a big white smoke. In this case you need to change the capacitors that are near to the power supply plug. Here is a excellent tutorial you can check out here.
You can also watch this video to install the Ayab hack on your machine :
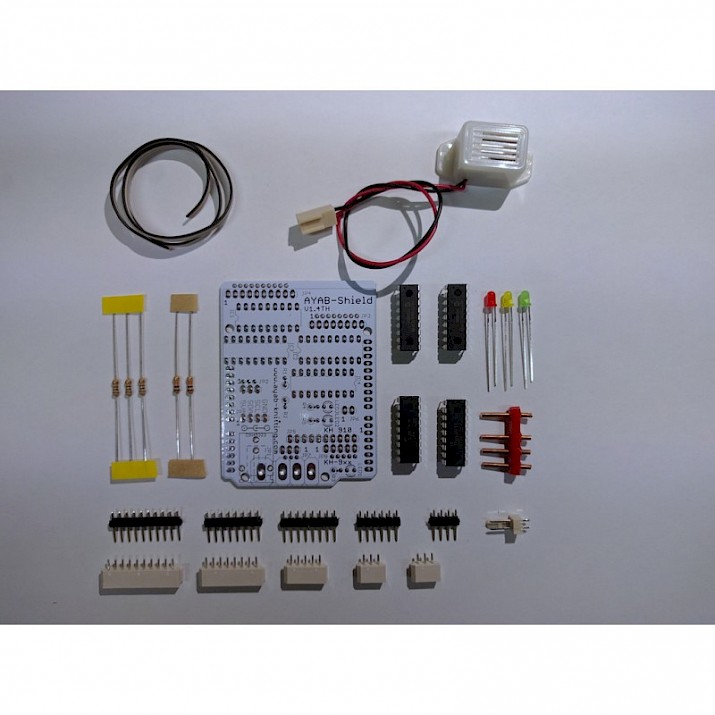
You will need to order a ayab kit here: http://ayab-knitting.com/how-to-get-ayab/
be sure to check the good model of kit according to your brother knitting machine serie no. KH 910+KH950 are the same kit and KH 940/930/965 are another type of kit.
You will also need:
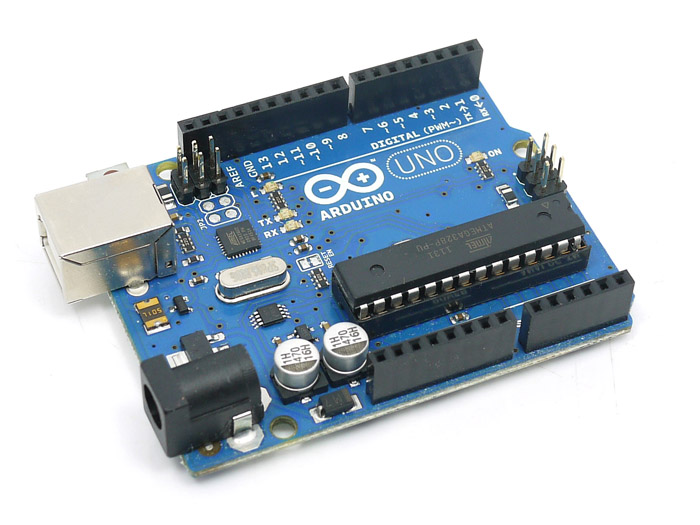
- x 1 Arduino Uno
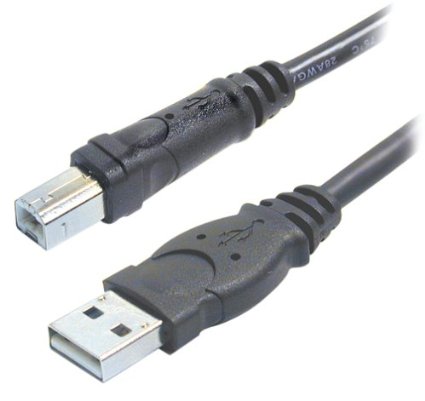
- x 1 Belkin Usb cable (the same used for printers)
- Computer with Linux, MacOSX or Windows operating systems.
Setting up the hack on the machine :
- Solder your kit according to the instruction you got when you recived your ayab shield.
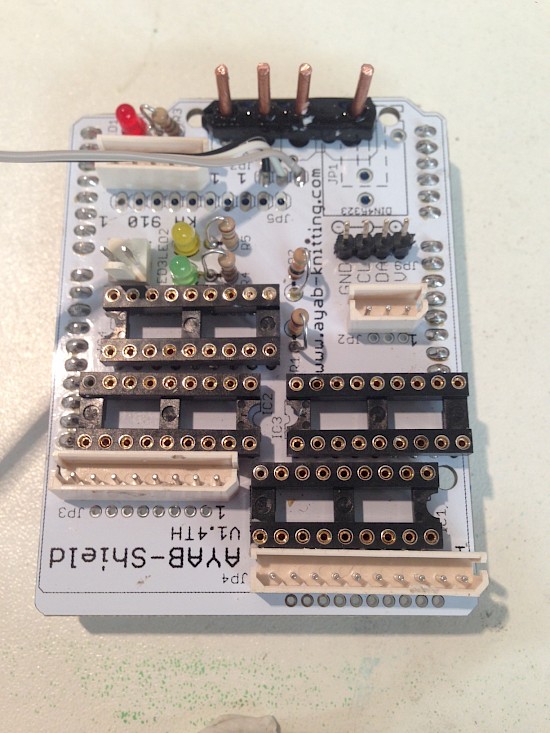

2. Carefully connect your Ayab shield circuit on top of the Aduino Uno board.
It’s safe to put some masking tape on the pins left out who may touch your shield or on the Arduino boar

3/ Unscrew the screws on the plastic part on the left part of the machine where the computer and the row counter are located.
You will see then the original pcb computer of the kh 940 knitting machine connected with cables and white connector heads (molex connectors) and the power socket. You can disconnect them all to remove the original computer board completely from the machine. If you want to go back using the original computer board you can just re-plug everything back in place at any time.


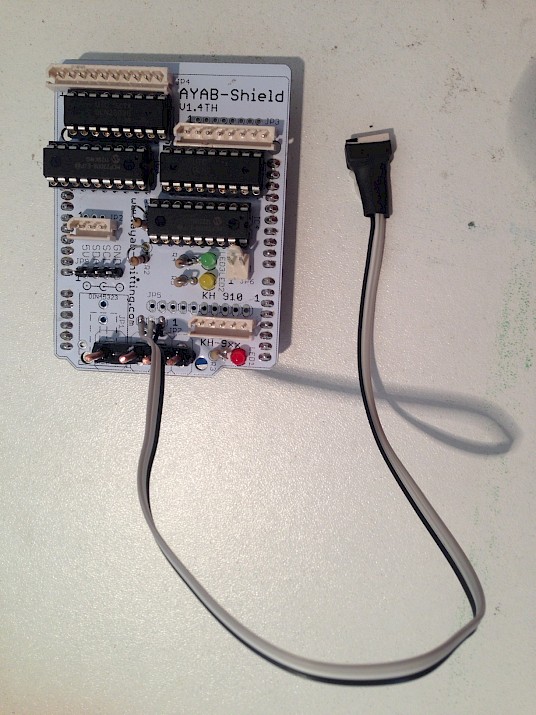
5/Connect all the molex connectors of the knitting machine to the connectors on the Ayab shield. There are 2 3 pin connectors, the extended connector (black, white, grey) goes to the far right side of the machine (the right sensor). Protect the arduino or shield so that it isn’t touching the metal of the machine and be careful not to block the needles!
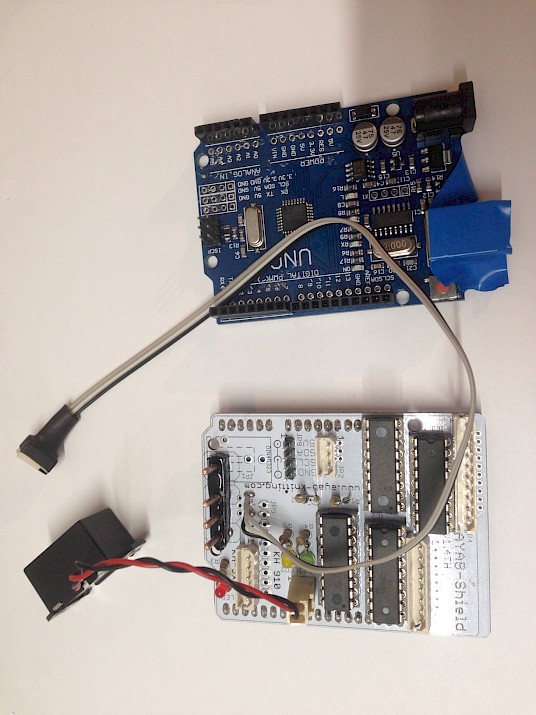
6/ Connect the Belkins usb cable to the Arduino board and to your computer
–> a red light lights up on the ayab shield
–>a green led lights up on the arduino

Software :
This is the same for any brother knitting machine model once you have flashed your arduino with the appropriate version for your knitting machine model (only kh910 ide will be different than the other kh 9xx series)
1/ Install the latest ayab software following the instructions on :
http://ayab-knitting.com/quick-start/
For linux users here is script to install everything at once: https://gitlab.com/gratefulfrog/installayab?fbclid=IwAR3KbBRrqrYMeAthVy44hAjf71izS57snWc1ZQvS3AJIB1XRoxFU9GJBIpU
2/ Once you have installed the software and got Ayab running you can prepare a picture to knit.
3/ Go to your graphic designing software (ex Gimp )
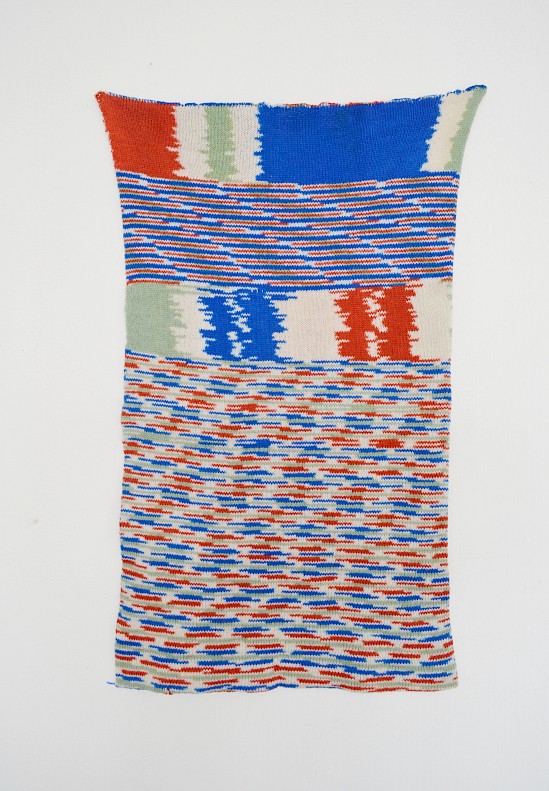
Make a sample image of 50×100 pixels for example. Make sure it is a black and white picture and save with a .png extension.
This is a test image example you can also use:

4/ Go to your knitting machine and connect the grey power cable of your knitting machine and plug it to a power source.

5/ Put the carridge of the knitting machine & yarn tension holder on the ribber
6/ My pattern is in my case 50×100 pixels. Translated in knitting language that is 50 needle large and 100 row (height) . You can see on the ruler along the needle bed the machine needles goes from 100 to and 0 (yellow) and 0 to 100 green). In knitting machine conventions we always refer to 0 as the middle of a pattern or a knit.
Cast on by placing your stitches in the center that is in my case the far left needle is on the 25 needle (yellow) and far end needle 25 green. You can always change that in the Ayab software parameters if you want to your pattern to be knitted somewhere else.
7/ Knit a few rows and place your carridge to the far LEFT side of the machine (be sure it’s a little after the left end line sensor mark)

8/ Set KC II on the knob and push the MC button on the carridge.
9/ Turn the knitting machine on
→ the green led should lit up from the machine
And plug the Arduino USB cable into your computer
10/ Load your picture in Ayab software and configure the settings according to your image.
11/ Check that your USB port is detected

12/ Clic on
- configure
and
- Knit
WAIT TILL THE FOLLOWING MESSAGE APPEARS:
‘Please init machine. (Set the carridge to mode KC-I or KC II and move the carriage over the left turn mark)’

13/ Move slightly your carridge back and forth to indicate to the left hall sensor that your carridge is active. You will here a BEEP! And then a second BEEP! BEEP! Once it has beeped twice you can move your carridge all over to the right to do your first row. You can now see that some needles have been selected and pushed to D and E position this means the needles are correctly positioned and you are now ready to knit your pattern.

14/Once your carridge is on the right you can now put your 2nd yarn color in the yarn feeder (b) on carridge.
15/ Slowly knit from left to right. Each time you hear the buzzer it’s says it’s ready to knit the other row

In my terminal i can also check that the 0’s and 1’s (translated from b&w picture) are correctly sent row by row to the knitting machine. It sends a new line to the machine each time you pass the hall sensors so take care to go right past it and hear a BEEP! each time you knit another line.

Pattern is always faced from the back side when knitted
So now you can go ahead and knit your picture until the end.
KH 910 or KH 950 Brother Knitting Machine
Version: AYAB GUI beta 1 (OLD,OLD,OLD version! Please use the latest up to date relase!!)
Tested on: KH 910 Knitting machine and Ubuntu 14.04
July 2014
This hack for knitting machine is a project from Ayab :
https://bitbucket.org/chris007de/ayab-apparat/wiki/Home
This tutorial is assuming you know how to knit with the knitting machine.
You can also watch this video to install the Ayab hack on your machine :
To Order the AYAB shield: https://shop.thinkstack.de/gb/
https://www.etsy.com/search?q=hack%20ayab
You will also need:
- x 1 Arduino Uno Board
- x 1 Usb cable
-Linux, MacOSX and Windows operating systems.
Setting up the hack on the machine :
1/ Carefully connect your ayab pcb shield and the arduino uno –
It’s safe to put some masking tape on the pins left out who may touch your shield.


2/ Unscrew the screws on the plastic part on the left part of the machine where the computer and the row counter are located.


You will see then the original pcb computer of the kh 910 knitting machine connected with cables and black connecter heads which each have numbers written on them (S1, S2, S3 ..etc…).
3/ Disconnect all the connecters from the original computer board of the machine in order to remove the board completly from the machine.

We will now just use the S2, S3, S5,S7 & S1 connecters.
You can cut the small plastic clamp that ties the S1 power connecter to give it more length to attach to the shield.
4/ Connect the S2, S3, S5,S7 & S1 connecters to the pins of the ayab shield as shown..


BE CAREFULL TO RESPECT IN WHICH WAY YOU CONNECT THEM !
Check on the pictures in which direction the side of the connectors should be facing .
5/ Cut ou a piece of cardboard paper to avoid the arduino touching the metal of the machine, be carefull not to block the needles!
6/ Connect the usb cable to the arduino board and to your computer
–> a red light lights up on the ayab shield
–>a green led lights up on the arduino
7/ Connect the grey power cable to your machine and plug it to a power source.
8/ Put the carridge of the knitting machine & yarn tension holder on the ribber
My pattern is 64×64 pixels. Translated in knitting langage that is 64 needle large and 64 row (height) . You can see on the ruler along the needle bed. The machine needles goes from 100 to and 0 (yellow)and 0 to 100 green )
9/ Cast on by placing your stitches in the center that is in my case the far left needle is on the 32 yellow needle far end needle 32 green.
10/ Knit a few rows and place your carridge to the far LEFT side of the machine (be sure it’s a little after the left end line sensor)
11/ Set KC II on the knob and push the MC button on the carridge.
12/ Turn the knitting machine on
→ the green led should lit up from the machine
Software :
1/ Install the ayab software following the instructions on :
https://bitbucket.org/chris007de/ayab-apparat/wiki/english/Home
2/ Once you have installed your files at your prefered location in a folder you will see different folders.
3/ Go to your graphic designing software (ex Gimp )
Make a sample image to test on for example.
For example make a 50×50 pixels black and white picture.
4/ Once it’s saved as .png put your image in :
/home/wiwi/ayab/software/python folder

5/ Open up your Terminal window.
and go to your python folder by typing the path of your folder with the Ayab software:
In my case :
cd /home/(username)/ayab/software/python
Then type :
python ayab_commandline.py « name_of_your_picture ».png
For exemple my picture is called « damier.png » So i typed :
python ayab_commandline.py damier.png

The Python script is now opened through my terminal Window where we can see diffrent options to change parameters of the pattern or place the pattern somewhere else than in the center.
Since i chose to knit my pattern in the center it will automatically be placed it there.
So i can choose ::
« 9 – knit image with current settings »
So i type :
9
and press ENTER
I now see in the terminal window a message :
>Please init machine

6/ Set your row counter at 0
7/ Move the carridge from left to right
Press ENTER again in tour terminal
– you should hear the buzzer make a sound at the end of your row and then your terminal says ;
>Please init machine
=================
>Ready to Operate
=================
[0, 1, 1, 1, 1, 1, 1, 1, 1, 1, 1, 1, 1, 1, 1, 1, 1, 1, 1, 1, 1, 0, 0, 0, 0, 0, 0, 0, 0, 0, 0, 0, 0, 0, 0, 0, 0, 0, 0, 0, 0, 0, 0, 0, 1, 1, 1, 1, 1, 1, 1, 1, 1, 1, 1, 1, 1, 1, 1, 1, 1, 1, 1, 1] Image Row: 0 (indexToSend: 0, reqLine: 0, lineNumber: 0, lineBlock:0)

–> A yellow led lights up on the ayab shield
I can now see that some needles have been selected and pushed to D position this means i am ready to knit a pattern .

7/ Now put your 2nd yarn color in the yarn feeder (b) on carridge

8/ Slowly knit from left to right
Each time you hear the buzzer it’s says it’s ready to knit the other row

Pattern is always faced from the back side when knitted
So now you can go ahead and knit your picture !!